
Templates for Amazon Connect simplify time-consuming, error-prone deployment tasks
Manual set-up of services or applications on Amazon Web Services (AWS) has been a time-consuming task that brought a high risk of errors. No longer. With the introduction of CloudFormation templates for Amazon Connect, AWS resources can now be securely, efficiently, and repeatably deployed.
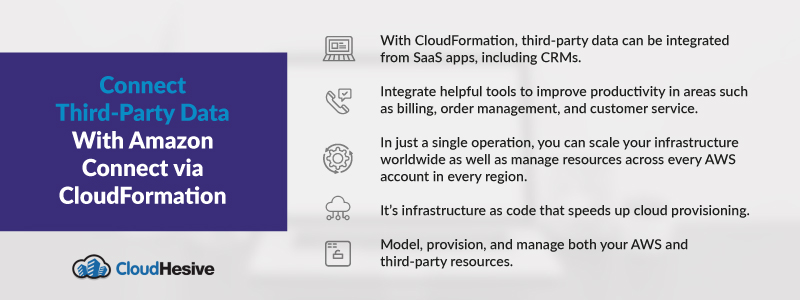
With Amazon Connect CloudFormation, third-party data can be integrated from SaaS apps such as CRMs as well as solutions for quality management, billing, and order management. With data integrations, you can integrate helpful tools such as knowledge articles from other applications. These can then be surfaced in the Amazon Connect agent application to help agents be more productive and quickly resolve caller issues.
You can scale your infrastructure globally and manage resources across all of your AWS accounts and regions in a single operation. CloudFormation is available in all regions where Amazon Connect is available. Here’s how it works and how to speed up cloud provisioning with infrastructure as code.
How CloudFormation works
With CloudFormation, you can model, provision, and manage your AWS and third-party resources by treating infrastructure as code.
- You can code your infrastructure with the CloudFormation template language in YAML or JSON format or begin by using an available sample template.
- Then, you’ll either check out your template code locally or upload it to one of your S3 buckets.
- You’ll then create a stack based on your template code using CloudFormation via the browser console, command line tools, or APIs.
AWS CloudFormation then provisions and configures the stacks and resources as specified in your template.
Getting started with AWS CloudFormation
By using the right template, you can deploy all of the AWS resources you need for an application all at one time. You’ll need a template that specifies the resources you want in your stack.
About templates
AWS CloudFormation templates can be authored in JSON or YAML. You can view the JSON or YAML template, which is a text file that contains configuration information about the AWS resources you want to create in the stack. Because they are text files, you can create and edit them in any text editor as well as manage them in your source control system with the rest of your source code.
You should choose the format that you are most comfortable using, keeping in mind that YAML provides some features that aren’t available in JSON. If you are unfamiliar with JSON or YAML, you can use the AWS CloudFormation Designer to get started.
The following JSON and YAML specifications, with some exceptions as noted, are supported by CloudFormation:
- JSON – CloudFormation follows the ECMA-404 JSON standard.
- YAML – CloudFormation supports YAML Version 1.1 specifications with some exceptions.
Unsupported YAML features include the binary, omap, pairs, set, and timestamp tags, aliases, and hash merges.
The templates have a number of top-level sections, but only the Resources section is required. This contains the definitions of the resources you want to create with the template. List each resource separately, specifying the properties necessary to create a particular resource.
Resource declarations are an efficient method to specify configuration settings such as ImageID, InstanceType, and KeyName all at once. Once you create and configure declared resources by using the template, you can create a stack.
Begin your resource declaration with a string that gives a logical name for the resource. This name can be used to refer to resources within the template.
- Use the Parameters section to declare values to be passed to the template when you create the stack. A parameter provides a way to specify sensitive information that you don’t want to store in the template itself, like usernames and passwords. You also can use parameters to specify information that is unique to a specific application or configuration you’re deploying.
- The Mappings section of the template is used to declare conditional values that are evaluated in a way that’s similar to a lookup table statement. The template uses mappings to choose the right Amazon Machine Image for the region as well as the architecture type for the instance type.
- Outputs define the custom values returned by the aws cloudformation describe-stacks command and in the CloudFormation console Outputs tab after the stack is created. Input values can be used to return information from resources in the stack, such as a website URL created in the template.
Create the stack
To create a stack, you’ll log into the AWS Management Console, and then open the AWS CloudFormation console.
1. Choose Create New Stack.
2. Specify an Amazon S3 Template URL in the Template section and choose Next.
3. In the Specify Details section, enter a stack name in the Name field. Note that the stack name cannot contain any spaces.
4. On the Specify Parameters page, you’ll see the parameters from the Parameters section of your template. Values must be provided for all parameters that don’t have default values. These include DBUser, DBPassword, DBRootPassword, and KeyName. Enter the name of a valid Amazon EC2 pair in the same region you are creating the stack In the KeyName field.
5. Select Next.
6. If you like, you can add tags, which are key-value pairs. These can help you identify your stacks.
7. After you add tags, or if you do not want to add tags, choose Next.
8. Now, review all of the information for the stack. Once you’re satisfied with the settings, select Create.
Monitor stack creation process
Once you complete the Create Stack wizard, CloudFormation starts to create the resources specified in the template. Your new stack will appear in the list at the top portion of the CloudFormation console with a status of CREATE_IN_PROGRESS.
To view the events for the stack
- On the CloudFormation console, select the stack from the list.
- Choose the Events tab in the stack details pane. The console automatically refreshes the event list every 60 seconds.
The Events tab displays each major step in the creation of the stack sorted by the time of each event, with latest events on top. The first event (at the bottom of the event list) is the start of the stack creation process. Next are events that mark the beginning and completion of the creation of each resource.
- The CREATE_IN_PROGRESS event is logged when CloudFormation reports that it has begun to create the resource. The CREATE_COMPLETE event is logged when the resource is created successfully.
- When CloudFormation has created the stack, you will see the following at the top of the Events tab: 2013-04-24 19:17 UTC-7 CREATE_COMPLETE AWS::CloudFormation::Stack StackName
If CloudFormation can’t create a resource, it reports a CREATE_FAILED event and, by default, rolls back the stack and deletes any resources that have been created. The Status Reason column displays the issue that caused the failure.
The stack keeps its identity after it has been created, so you can easily delete it when you no longer need it.
To delete a stack
Deleting a stack will also delete its resources. It’s important to note that while AWS CloudFormation is free, the AWS resources that CloudFormation creates are live – not running in a sandbox. This means you will incur standard usage fees for these resources until you delete them. For information about how to minimize any charges, go to http://aws.amazon.com/free/.
1. Choose the stack by name from the CloudFormation console.
2. Choose Delete Stack.
3. You’ll see a confirmation message–choose Yes, Delete.
You’ll see a status for that stack has been changed to DELETE_IN_PROGRESS. Once the stack has been deleted, you will see it has been removed from the list.
Amazon Connect CloudFormation makes it extremely easy to create, manage, and destroy entire application stacks, eliminating the work of important but lower-level details.
Make the most of every AWS feature with CloudHesive
We’re a cloud solutions consulting and managed service provider with expertise in all things Amazon Web Services. We have eight AWS Competencies, more than 50 AWS Certifications, membership in nine Partner Programs, and the experience and knowledge to help your business realize all the benefits of AWS cloud.
We’ve helped more than 100 companies reduce their operating costs and increase productivity with our focus on security, reliability, availability, and scalability. With over 30 years of experience, we leverage cloud-based technology to its full potential. Contact the CloudHesive team today.


